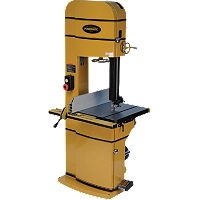
But band saws have one inherent problem, and that problem is that most of them will tend to "drift" when they are cutting through wood. What this means is that if you are ripping a piece of wood, and following a marked line, there is a very good chance your band saw will develop a mind of it's own and start cutting off that line. This drift is caused by a variety of elements like the grain of the wood, they type band saw blade you are using (and how sharp it is), the tension on the blade and even whether or not the blade is running true on the 2 band saw wheels. It is often possible to reduce drift but in most cases you have to learn which way your band saw will drift and take that into account when you are cutting wood.
Another inherent feature of all band saws, particularly when they are ripping wood, is that at the beginning of the cut the saw will cut quickly but as it is cutting through the wood the speed at which the wood is cut is noticeably slowed. Again this is typical of almost every band saw, small or large, so if you find this happening with your saw ... it is not "your saw" it is all saws that have this quirk.
Setting up a band saw is an important step in order to get the best cuts and help preserve the life of your blades and your saw. It is important that power to the saw be turned off before any setup is attempted. The first step is to set the BLADE TENSION, which, on most 2 wheel band saws is done by RAISING the top wheel with the appropriate adjustment knob or wheel on your band saw ....
Most band saws will also have some sort of a gauge associated with the tensioning wheel. Often these gauges will display numbers like 1/8" - 1/4" - 1/2" and so on. What these refer to is the size of blade that is installed on the band saw. For example if you have a 1/4" band saw blade installed on the saw, you will turn the tension wheel until the gauge reades 1/4" - as this is the proper tension of this size of blade. If you tighten a blade too much, you risk snaping the weld on the blade.
The second thing to check, after the blade is tensioned, is how the blade is tracking on both the top and bottom wheels. You can easily do this by turning the top wheel by hand. If the blade is tracking to one side or another on the wheel, there will be another adjustment that will actually tilt the top wheel slightly, one way or the other so that the blade will begin tracking in the center of the top wheel. If the blade is tracking on the center of the top wheel, quickly check the bottom wheel to makes sure it is also tracking in the centre. At this point it is wise to give the top wheel a number of spins to make sure that the blade continues to track in the centre. If you are satisfied with the tracking, you can close the doors and move on to the final adjustment.
The blade guide assembly is the final setup. In this, both the upper and lower guide assembly may need to be adjusted for each different size blade that is installed. To adjust these units, first of all determine on your saw, how they are adjusted. Some saws use thumb screws while others use Allen screws. To adjust the blade guides it is important that the tension is set and that the blade is centered on the wheels. The blade guide assemblies will consist of three compontents, at the back of the blade will be a Thrust Bearing and on either side of the blade will be some guide blocks (often called cool blocks). To set all three of these guides, they need to be adjusted so that while the blade is at rest, in other words, the machine is NOT turned on, but is fully tensioned and set. To set these three guides they should be not touching the blade, but their should be the slightes gap between them and the blade, about 2 or 3 times the width of a piece of paper is good.
Once both top and bottom guide adjustments are set, now is the time to replace all guides and close all doors and turn the machine on and listen to it for a few moments. If you do not hear any sounds of scraping metal, which would be the blade rubbing on one of the guides. If it does you may need to go back and tweak some adjustments.
Working with a band saw does take a bit of a knack and you will learn that knack very quickly and discouver like many of us, that the band saw is awesome, often over looked tool.
Copyright - Colin Knecht
woodworkweb.com
